Yejun Wu
This brief tutorial records the steps I took to build the RideFinder database (in Access 2000). Please refer to the slides for the entity relationship model (or table structures) of the database. This tutorial does not address the various mistakes you might make. If you encounter an error, please either ask me (or the class on Moodle) or search the Web. I may use terms different from the official MS-Access documentation. If you find any mistake in the tutorial or if you have better terms than I use to describe the objects on the interfaces, please let me know.
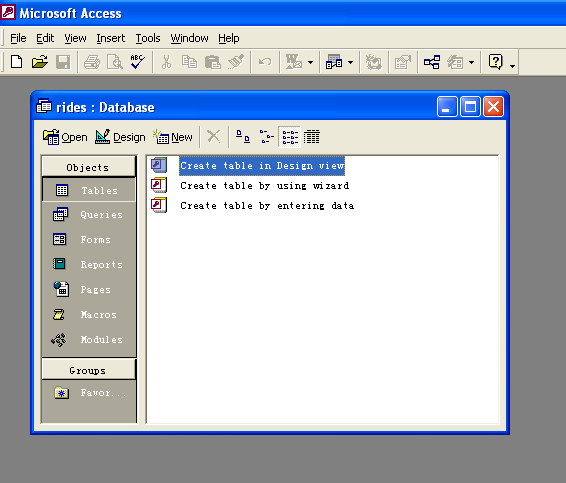
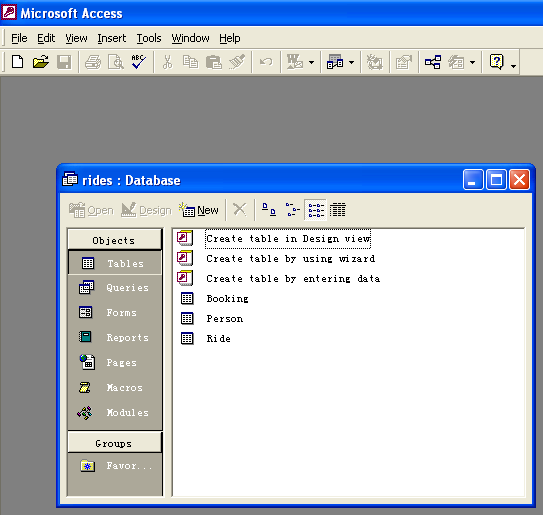
Open Access -> Create a new database using Blank Access database -> Specify file name (such as rides), save as type: Microsoft Access database. Then this interface appears:
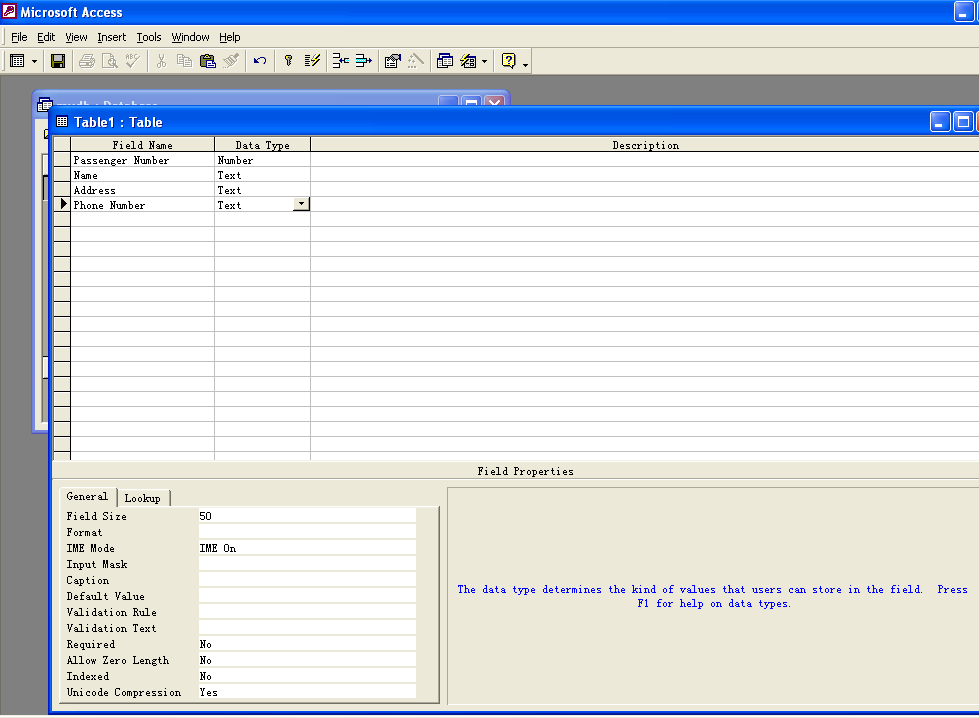
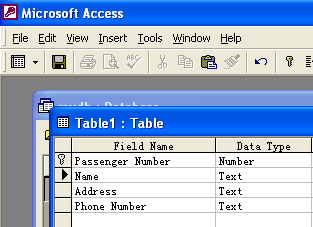
Double-click "Create tabe in Design view", an empty table for Table1 appears. Type in the Field Name and specify Data Type for Table1. Field name must be unique, but only within the same table. Select field type from a menu. Use date/time for times; use text for phone numbers. I use number for Passenger Number. If AutoNumber is used, only one AutoNumber is allowed in one table. Here is the table for the Person entity, which is "Table1" before I name it as "Person".
Close Table1 by clicking the X button at the top-right corner of the interface. Save the table as "Person", click OK.

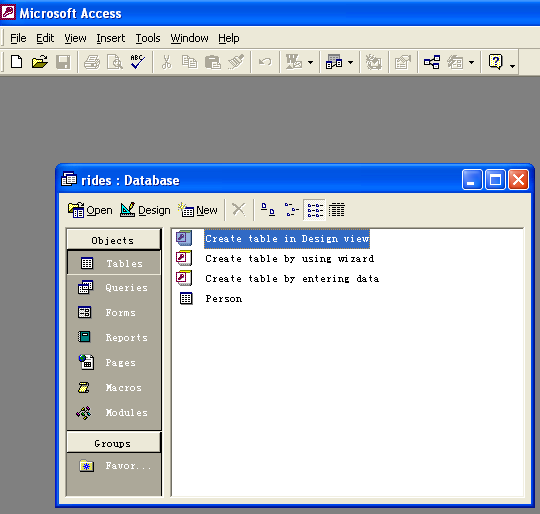
The "Person" table is created and added to Tables view, as shown below.
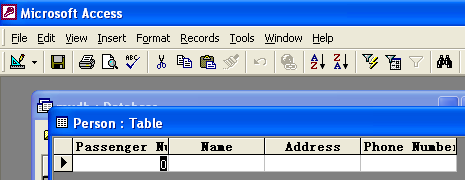
Double-click the "Person" icon to open the Person table. The fields of the Person table appear as colomns, as shown below.
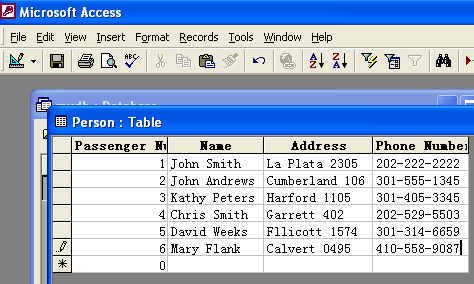
Enter data for each record (i.e., row). Enter new data in the bottom row. (AutoNumber is automatically filled.)
Data is automatically stored in the table. Close the table by clicking the x button.
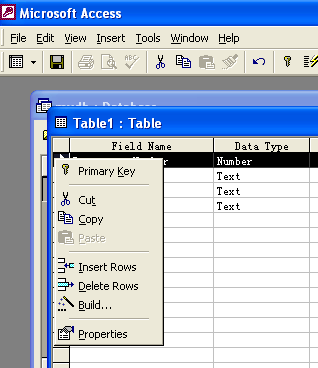
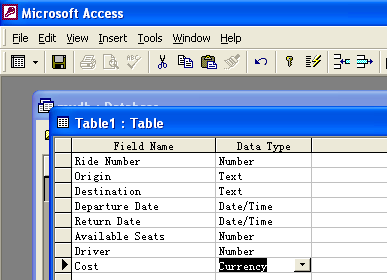
Repeat Step 2, 3 and 4 to create the "Ride" table and "Booking" table. The primary key of the "Ride" table is Ride Number. The primary key of the "Booking" table is Booking Number.
Here are the fields of the Ride table:
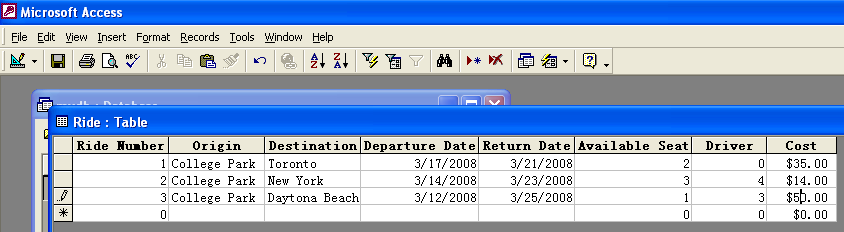
Here is the Ride table with several records:
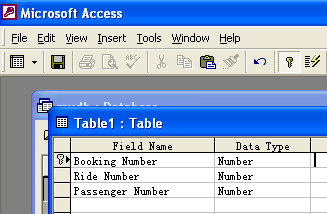
Here are the fields of the Booking table:
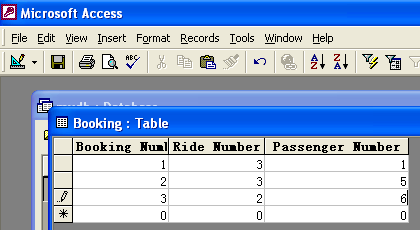
Here is the Booking table with several records:
So far I have created 3 tables: Booking, Person, and Ride, as shown on the Tables view:
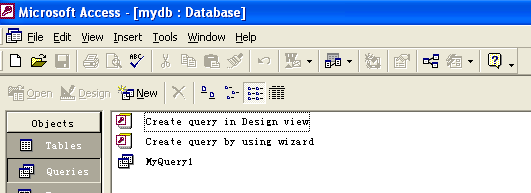
Click the "Queries" tab under "Objects" on the left pane --> double-click "Create query in Design view." It shows the query interface:
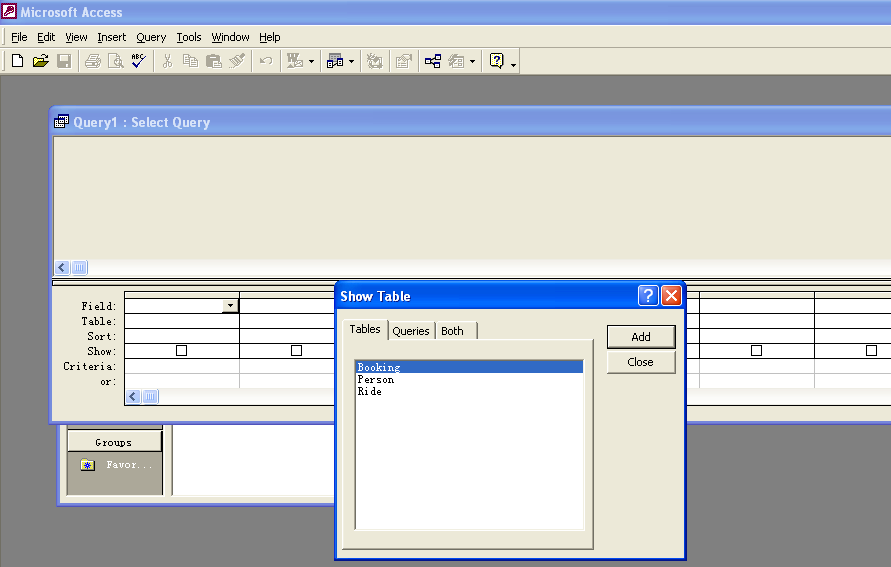
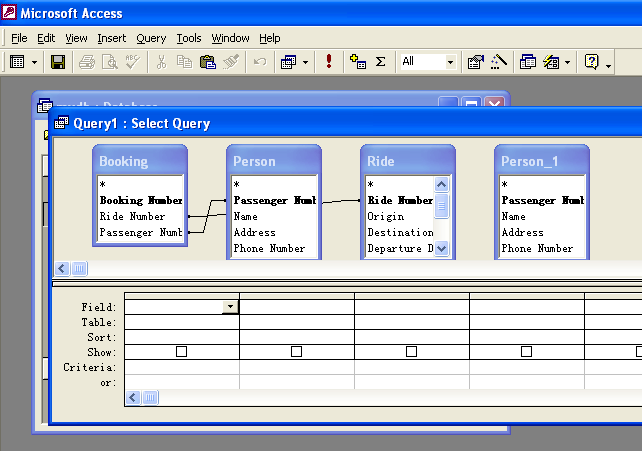
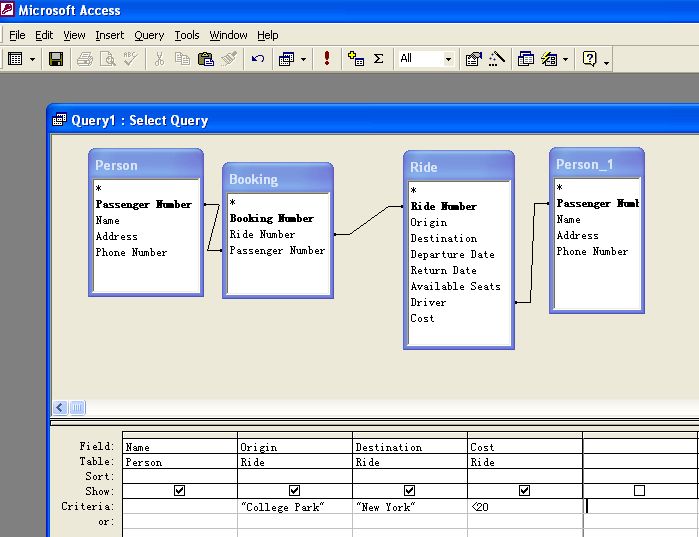
My query is to find all the passengers who need a ride from "College Park" to "New York" with cost less than $20.00. So I need all of the 3 tables. I need to highlight a table, then click "Add" to add that table to the query pane, which is a visual programming environment. Note that the foreign key of a table is automatically related/linked to its primary key in the other table by displaying a physical line as shown in the following screenshot.

"Driver" in the Ride table is actually a Person entity which has the same attributes as a passenger. I should have used "Person Number" rather than "Passenger Number" in the Person table to be more intuitive. I intentionally use "Passenger Number" in the Person table for the two purposes: (1) distinguishing passenger from driver, and (2) demonstrating manually relating/linking two fields in two tables. "Driver" in the Ride table is a foreign key that refers to "Passenger Number" which is the primary key of the Person table. Note that "Driver" and "Passenger Number" are of the same data type (i.e., number), so I can relate/link them. Fields with different data types (such as text and number) can not be linked; if you try to do so, an error will be reported. In order to relate/link "Driver" with "Passenger Number", I need a copy of the Person table so that the relationship between the tables can be shown clearly. Highlight the Person table again and click "Add" to create a copy of the Person table, which is Person_1, as shown in the following screenshort, then click "close."
The tables can be enlarged and moved around (using the mouse) to display a better view. Here is a way linking "Driver" in the Ride table and "Passenger Number" in the Person table. click and drag "Driver" in the Ride table onto "Passenger Number" in the Person_1 table, then release the mouse. Now the two fields are related/linked as shown in the following screenshot.
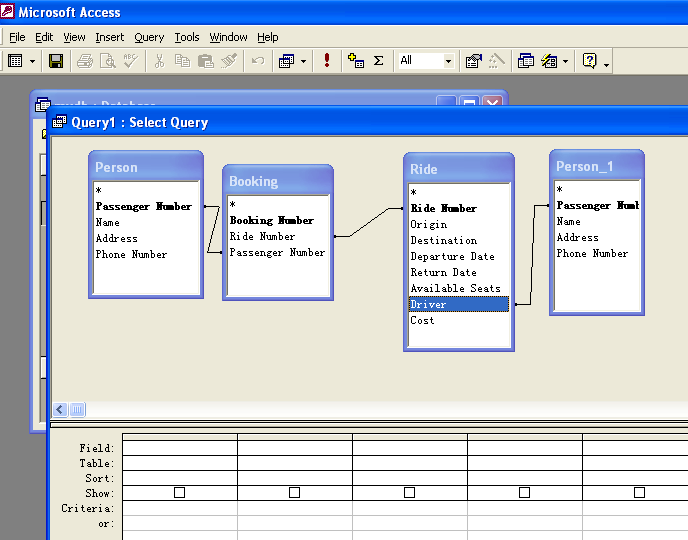
If you have created an incorrect relationship (or link) by mistake, it can be deleted by right-clicking the link and selecting "delete".
The bottom pane allows me to select the fields I want to display/project on the result of the query, and the conditions I want to restrict. I selected Person.Name, Ride.Origin, Ride.Destination, Ride.Cost, and and specified my restriction conditions as shown in the following screenshot. Again, my query is to find all the passengers who need a ride from "College Park" to "New York" with cost less than $20.00. The notation "Person.Name" means the Name field of the Person table. If the "Show" checkbox is checked, that field will be shown on the query result.
Click the x button to close and save the defined query (e.g., MyQuery1); it is now shown on the Queries view:
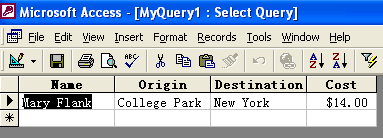
Double-click "MyQuery1" to run the query. Here is the result of that query: